Gutenberg was first released with WordPress 5.0 a little more than two years ago. With the dramatic shift from the Classic editor to block-style editing, many bloggers were hesitant to make the change, opting to stick with the Classic editor instead.
But Gutenberg is here to stay, and it’s been winning bloggers over steadily with its powerful editing tools.
Whether you’re just getting started with Gutenberg or you’ve been using it from the beginning, here are 10 Gutenberg tips and tricks to help you write and edit blog posts faster:
1. Copy & paste from word processors
In the past, copying and pasting from Microsoft Word, Google Docs, or another word processor into WordPress presented all kinds of challenges—from disappearing images to extra code within the <span> tags.
With Gutenberg, however, you can safely copy and paste from other programs directly into your WordPress dashboard. The content is automatically transformed into blocks, images are uploaded into the media library, and the <span> tags are stripped out. This makes it so much easier to draft posts on your phone, collaborate in Docs, or write offline before copying content into a post draft.
2. Use the forward slash to add new blocks
The forward slash is a common keyboard shortcut in software-as-a-service (SaaS) applications. Known as slash commands, these commands are used to trigger specific behavior. In Slack, for example, you can use /giphy to insert a GIF into a message. In Confluence, / brings up the macro list. In Gmail, / focuses the search bar.
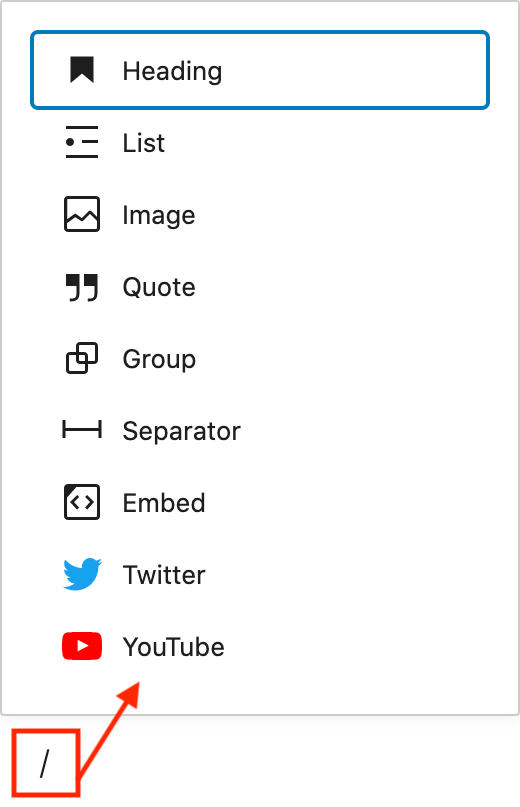
Similarly, you can use a slash command with Gutenberg to quickly insert the block of your choosing. Typing the forward slash brings up a menu of common blocks. But you’re not limited to the ones shown. You can also begin typing the name or description of the block. For example, I commonly use /div to insert a Separator (even though I am thinking “divider” instead of “separator” while I’m typing it).
3. Drag & drop images into the editor
Dragging and dropping has become prevalent behavior for uploading images across a variety of software packages. And now you can drag your images right into your blog post as well, saving yourself a few extra clicks in the process.
4. Easily link to other posts in your archive
Internal links are an important part of your SEO strategy, and Gutenberg makes it easy for you to link to existing posts in your archive.
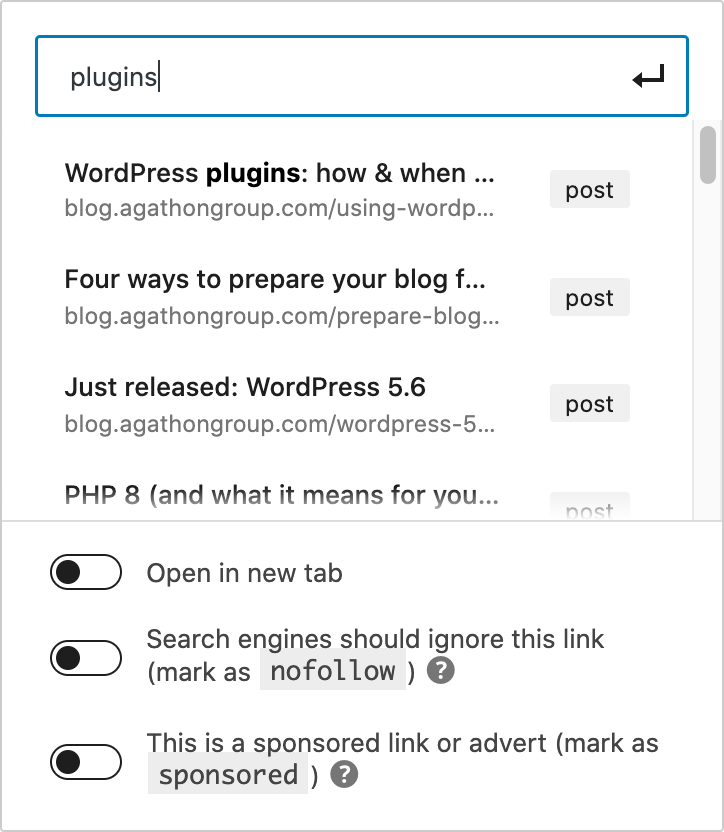
Click on the link icon or type ⌘+K (macOS) or ctrl+K (Windows) to open the hyperlink dialogue. From there, you can search keywords to find related posts rather than searching the front end of your blog in order to manually copy the hyperlink.
5. Use the outline for easy navigation
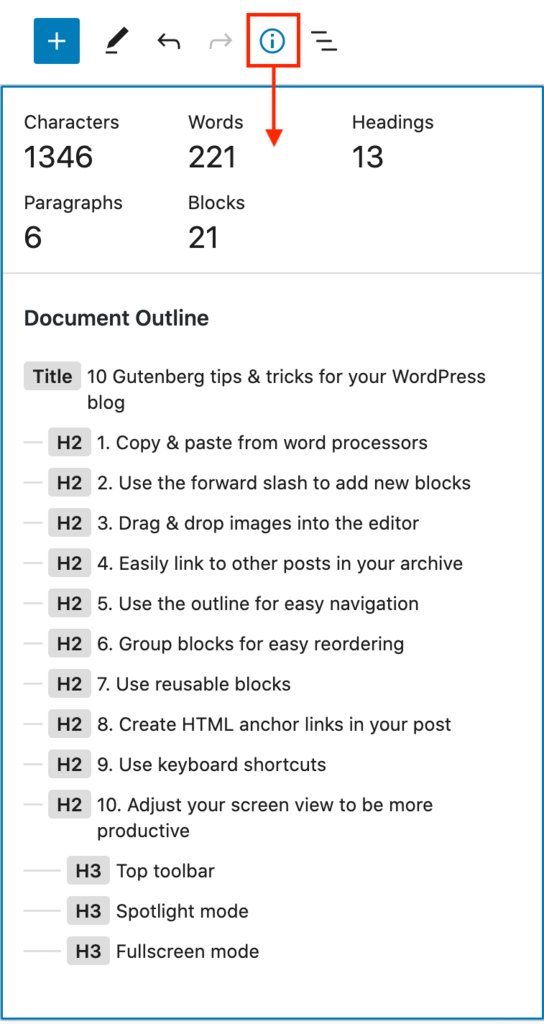
The information icon at the top of the editor provides data such as the character and word count of your post. But it also provides an interactive document outline based on your heading tags.
This is helpful for getting an overview of the post content and flow as you’re writing and editing. The interactive nature of this outline also makes it a useful shortcut. Click on any of the headings to jump directly to that section without having to scroll through images and text to find it.
6. Group blocks for easy reordering

One of my favorite tools in Gutenberg is the ability to rearrange and reorder blocks. While writing this post, for example, I started by making a list of tips. I then dragged those around until I was happy with the order before adding numbers to each item.
But this feature isn’t limited to single blocks. By using the Group tool, you can actually link multiple blocks together so you can drag or move them as a single unit. Grouping also allows you to change the block type of multiple blocks at once.
To group blocks, highlight the blocks you want to group together (hint: use shift + the arrow keys to do this from your keyboard), click on More options in the block tools and then Group. You can then drag the group or use the Move up / Move down arrows in the block tools to reorder the group.
7. Use reusable blocks
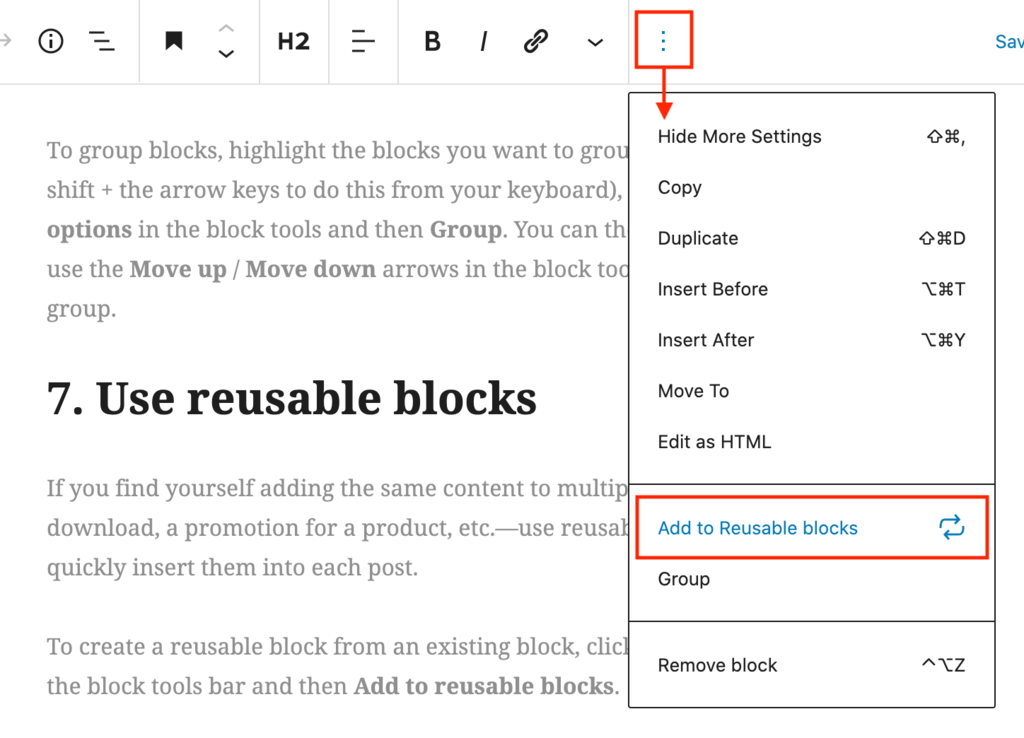
If you find yourself adding the same content to multiple posts—a free download, a promotion for a product, etc.—use reusable blocks to be able to quickly insert them into each post.
To create a reusable block from an existing block, click on More options on the block tools bar and then Add to reusable blocks.
To manage your reusable blocks, click Add block in the post editor and then Browse all. From there, the sidebar block menu will open. Click on the Reusable tab and then Manage all reusable blocks. From this page, you can create, edit, and delete reusable blocks.
Advanced tip #1:
When you make changes to a reusable block, it updates everywhere that block is used. That means you can update promotions, calls-to-action, and ads from one place.
Advanced tip #2:
To edit a reusable block in a single post, click on More options in the block tools and select Convert to Regular Block.
Advanced tip #3:
You can also add multiple blocks to a reusable block. To do this, group the blocks (see tip 6 above) and then click More options > Add to reusable blocks before clicking away.
8. Create HTML anchor links in your post
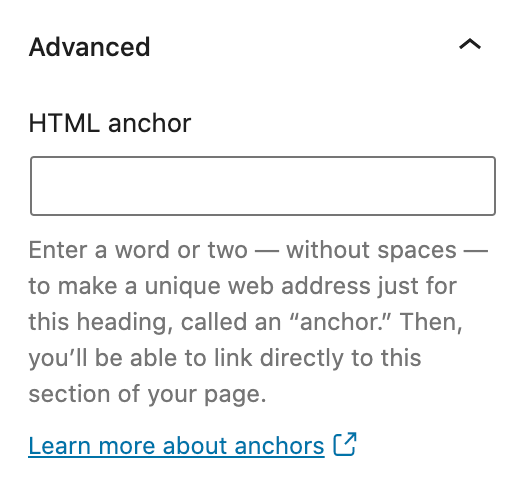
Have you noticed how many blog posts contain tables of contents these day? While these have always been useful, creating them used to involve manually coding anchor links and hyperlinks. However, Gutenberg includes an easy HTML anchor section that makes this tool accessible for everyone.
To add an anchor, look for the Advanced settings in the Block menu in the right sidebar of your post. Choose a descriptive word to serve as your anchor (for example, the anchor on this section is—you guessed it—anchor 🙂 ). To link to that anchor within the same post, highlight the text you want to hyperlink and add #anchor as the URL. To link to it externally, use the full post URL followed by the anchor, like this: https://blog.agathongroup.com/10-gutenberg-tips-tricks/#anchor

9. Use keyboard shortcuts
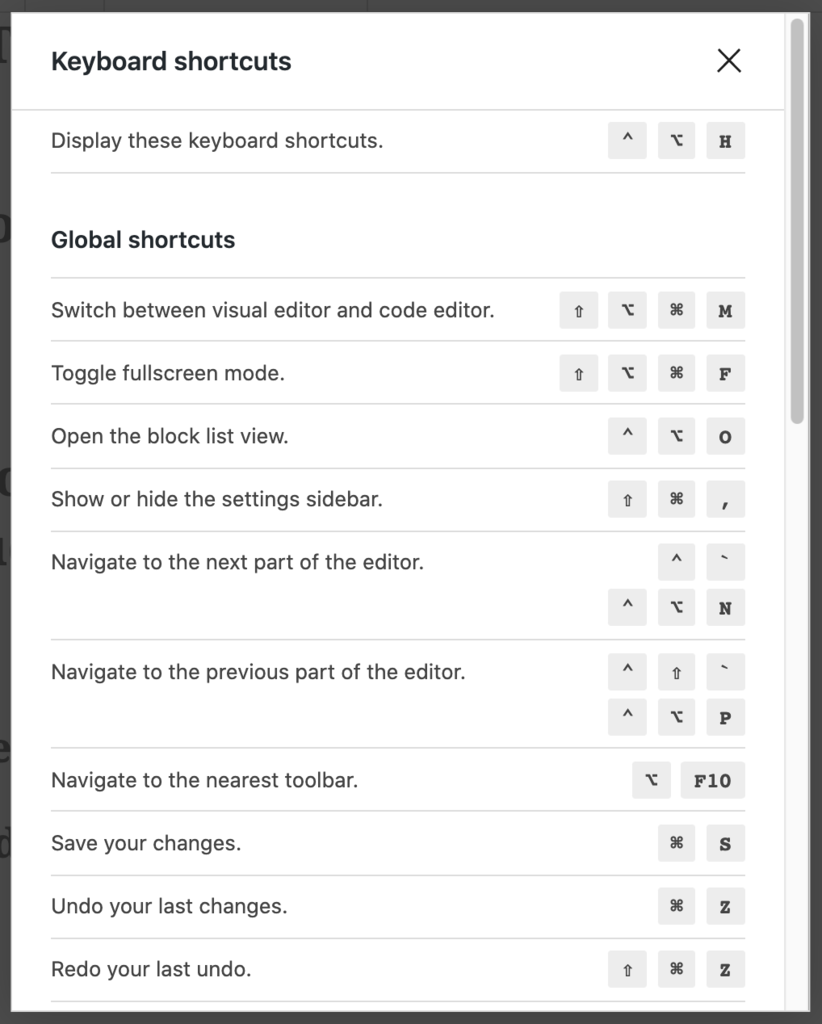
If you’re not already using keyboard shortcuts with the Gutenberg editor, now’s the time to start. In addition to the shortcuts you might already be familiar with—like copy, paste, and undo—there are shortcuts that change your view, insert blocks (see the slash command above), and more.
My favorite shortcuts aren’t on this list, though. In a new block, use # + space to create a new heading. One # designates H1, two ## designates H2, etc.
10. Adjust your screen view to be more productive
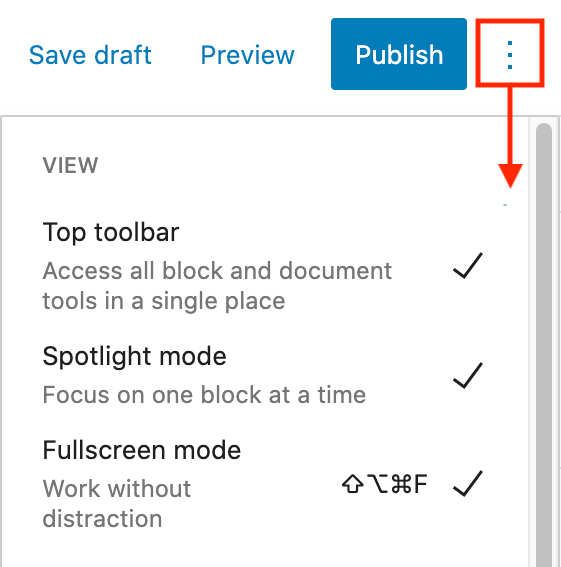
Finally, on the Options menu (in the upper righthand corner) you can customize your view to help you be more productive.
Top toolbar
The Top toolbar setting moves your formatting tools to the top of your editing window rather than in a floating toolbar at the top of each block.
Spotlight mode
Spotlight mode fades all of the blocks except the one you’re currently editing to keep you focused on a single block at a time.
Fullscreen mode
And Fullscreen mode eliminates the left WordPress sidebar and gives you more space for the editor.
These options are mix-and-match so you can choose the one(s) that work best for you, and they can be toggled on and off at any time from the Options menu.
The Gutenberg editor is here to stay, providing powerful editing tools for WordPress bloggers. I hope these Gutenberg tips and tricks have give you some additional ways to speed up your post creation and editing!

With 10 years of experience as a professional blogger—and as a former Agathon hosting client herself—Mandi’s passionate about the good work Agathon does and sharing that message with more people.